Mobicip's web filter can be very effective for large deployments in schools, groups or enterprise settings. Follow these simple steps to setup a large set of devices protected using a single Mobicip.com account. Don't have an account? Create one here.
Step 1. Setup Filter Profile(s)
Create one or more user profiles, one for each group of devices that will share the same filtering settings. For instance, you may want to setup a profile for each classroom, team or sub-group within a classroom.
- Using any browser, login at mobicip.com/enterprise
- Select Filter Profiles from the menu.

- For the filter profile you wish to edit, click the edit icon next to the restriction level.
- Select the restriction option and save your selection.
- Click on 'Add Profile' to setup additional profiles, say one per classroom or cohort of students.
Step 2. Deployment
Deploy Mobicip as a Global Proxy (on 'supervised' iOS devices only)
If your iOS devices are 'supervised' as defined by Apple, and you use an MDM or Apple's Profile Manager to manage them, you can deploy Mobicip's web filter as a global proxy.
- Contact support and request the iOS global proxy payload for your account. You will need to provide the following information:
- Your Mobicip username /email.
- An MDM payload variable that can uniquely identify a device. This could be the device name, serial number, username, etc. For a list of all payload variables available to you, contact your MDM vendor. For example, see JAMF's payload variables (on page 523) or ZuluDesk's payload variables or AirWatch's list of lookup values.
- Mobicip will respond within 1-2 business days with the proxy payload (one for each Mobicip filter profile) and SSL certificates.
- In your MDM program, create a new configuration profile for the each cohort of devices you wish to protect.
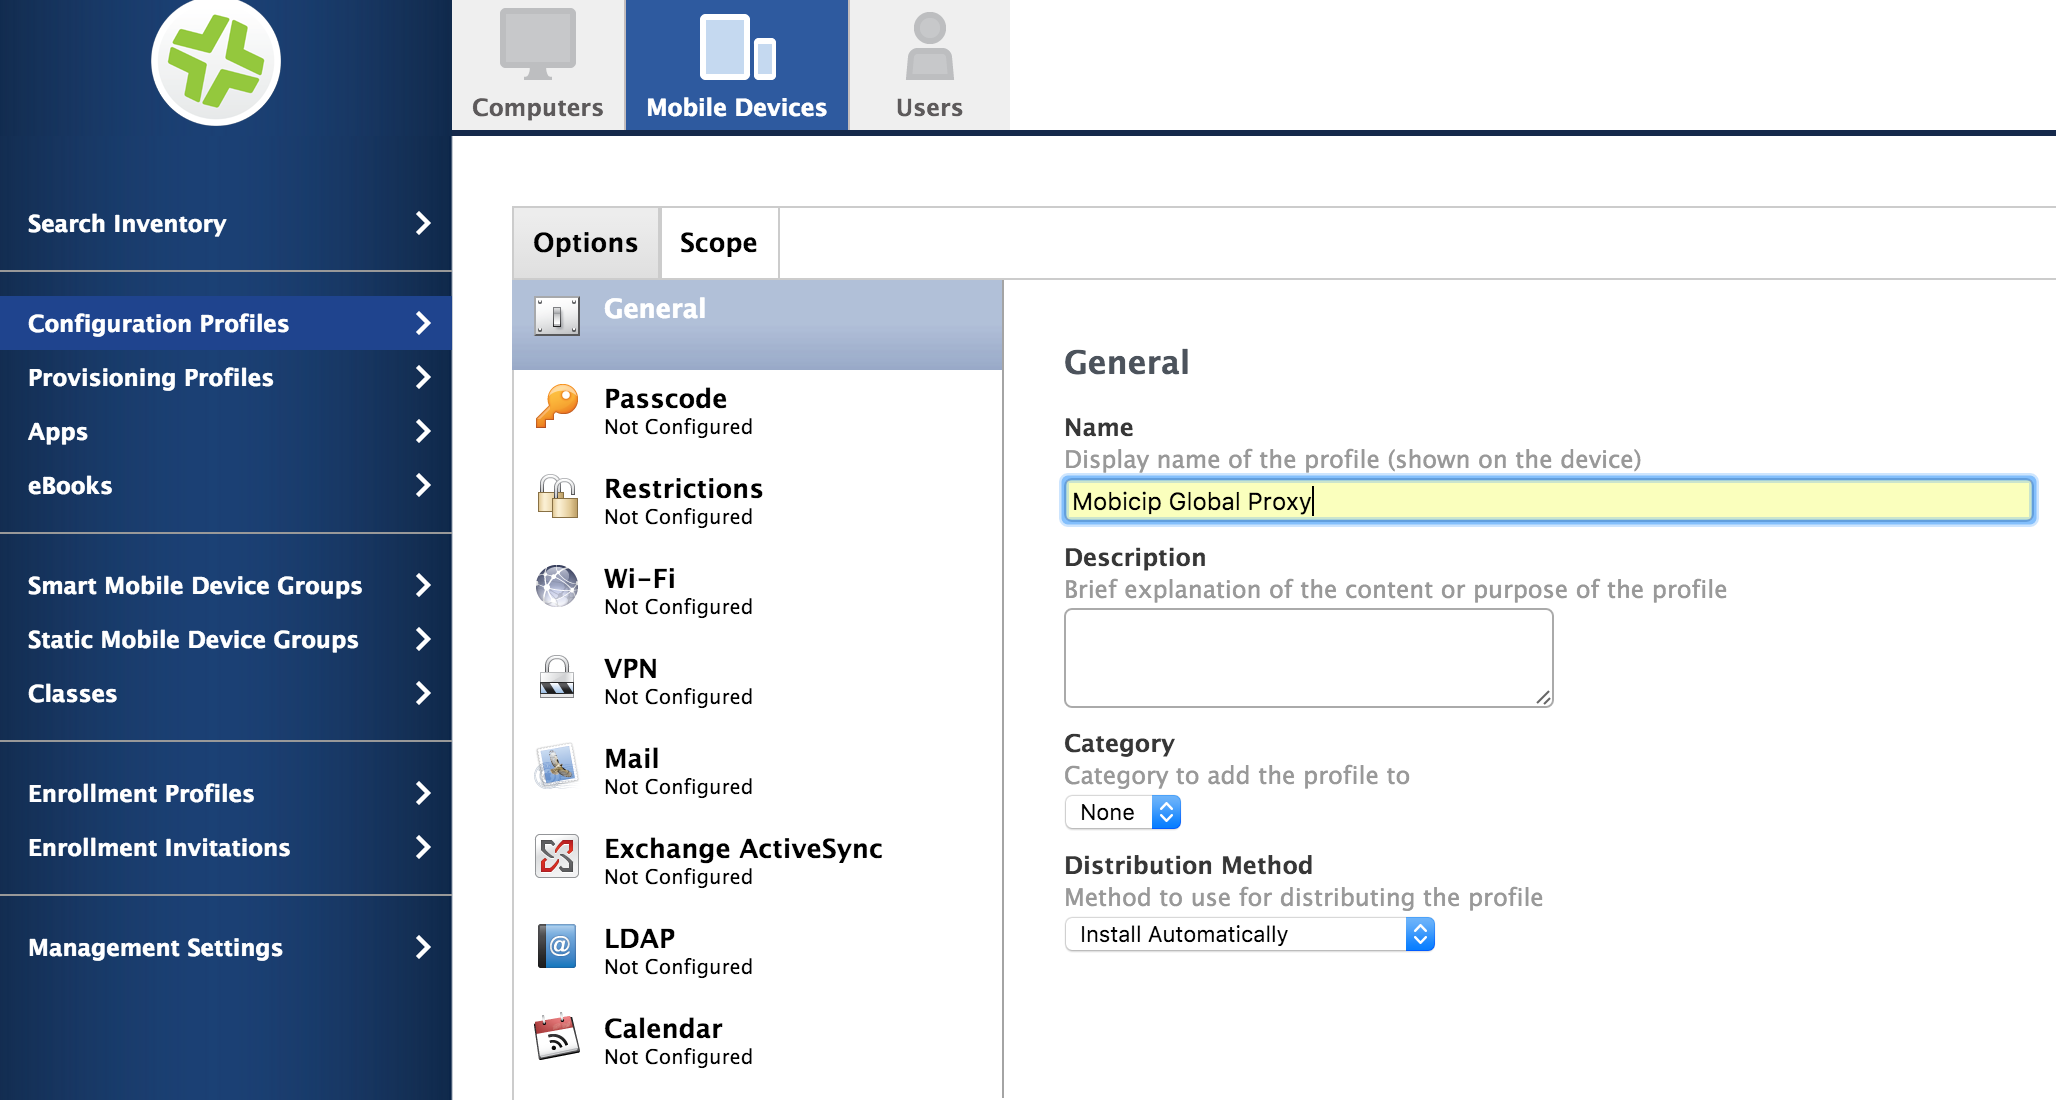
- In the Configuration Profile options, select 'Global HTTP Proxy'. Enter the payload information provided by Mobicip and save the profile.

- In the Configuration Profile options, select Certificates and upload the two SSL certificates provided by Mobicip.

- You may then push the global proxy configuration profile to the designated cohort of iOS devices. For help with this step, contact your MDM vendor.
- Repeat the steps above to create and deploy a configuration for each Mobicip filter profile.
Voila! You will see that Mobicip is now filtering the Safari browser or any other browser on the iPad.
Manage Your Account Online
Login at mobicip.com/enterprise from any browser to manage your filter settings and review browsing history.